Popular Posts

Showing posts with label WW2. Show all posts

Wednesday, 24 December 2014

WW2 Eastern Front game using modified Take Cover rules and a torrent of T34/76 and T34/85 tanks. PT1

 This we week thought that it would nice to get back out our WW2 collection, especially as Simon had just finished painting 3 of the new 1st Corps T34/85 's
A standard  T34/85 tank 'out of the box'

T34/85 with added fuel tanks and stowage.


T34/85 with added fuel tanks and stowage,
 showing the hatches open for addition of crew figures.

A company of T34/85's

German defences awate the onslaught.
'Sarge, i don't think my gun is big enough' 
                                 

A Corgi 1/50 scale Tiger 1 repainted by Simon picking its next victim !!

T34/76's backed up by the T34/85 command tank.

More T34's

View from behind the German lines,
 Russian T34's getting a bit too close for comfort.
 2 of T34's have have had their armament knocked out.
 They'll need to head back for repairs.

And on the other flank.

Part 2 should see the action heat up as the Russians close in.

Saturday, 28 June 2014

British Airborne Vickers machine gun

Simon has just finished painting this Vickers heavy machine gun and 4 crew.
He's done a great job.

 
There will be more releases for this range soon.

Tuesday, 26 November 2013

WW2 Jeep masters.


We've just received these new jeep masters.

Air landed Jeep.
The body will be a 1 piece resin casting.

The wheels, wind screen and  seat backs will be in metal.


 Radio Jeep.
The body will be a 1 piece resin casting.

The wheels, wind screen and  seat backs will be in metal. 
 Recon Jeep.
There will be single and double mounted vickers machine gun options.
The body will be a 1 piece resin casting.

The wheels, wind screen and  seat backs will be in metal.

There will be assorted drivers etc to go with each jeep.
Available soon......

Monday, 28 October 2013

WW2 Russians for Bolt Action

We picked up the rules and lists for Bolt Action a few days ago, thought we might give em a try.We have plenty of figures painted they just need organising into squads etc.here's a few photos of the Russians, Germans will follow shortly.
Heavy machine gun teams.
Anti Tank Rifle teams.
Heavy Mortar ready for action or (damn thats loud)
12 man rifle section with 2 LMG
10 man rifle section with 1 LMG

Assault section with SMG
T34/76 with supports on board.


Wednesday, 12 December 2012

28mm WW2 Russian and German new stuff

Here's a few of the new bits we had done to go with the 
demo /participation game.

Russian High Command, the guys giving out the orders.
German High Command, High ranking officers and communications team.

Rusian ammo carriers, or is it the vodka supply?
German ammo carriers, or perhaps liberated art treasures?
Russian Signal men, hoping the lend lease radios arrive soon,'Ivan my arms are aching'

We have tank riders and bits and pieces in the pipeline.

Tuesday, 4 December 2012

28mm Eastern European Buildings - Workbench

Having struggled to find buildings suitable for our Operation Kutosov participation game we decided to have our own produced.
The images below show the first masters by Pete Wilkes, designer for Total Battle Miniatures.
The range will eventually include a large and small house with seperate rooves.A church, barn, toilet, store house and well.

28mm Eastern European House with optinal porch. 
Eastern European House showing interchangable rooves.
28mm Eastern European well.
28mm Easter European Outside Toilet and Store Room

Tuesday, 9 October 2012

Making terrain for 1st Corps 28mm WW2 Operation Kutosov Part II

Its taken longer than intended but here is part II of the terrain blog for the 'Operation Kutosov' game.
 
When the green paint for the grass areas was dry we broke up the  colour using different shades of green and brown spray paint. We used Humbrol  sprays basically because thats what we had at hand.


Same idea for the wheat fields, yellow, ochre, sand and pale brown sprays were used.
 
As we'd used an acrylic sealer for the roads we were able to use acrylic paints  to paint the roads.
We went for country dirt roads for a more rural look.
The paints used were emulsion paints mixed for us at a local DIY store. We have a dark earth shade and 2 paler shades for highlighting.
This way we can make sure we  get consistant colours on our figure bases and terrain.
A Corgi 1/50 Panther alongside a 1st Corps 1/48 scale T34
A close up of one of the village strong points usedin the participation game.
Buildings are by Hovels(supplied painted many years ago),fences are the plastic ones by Renedra all mounted on hardboard bases and textured by ourselves.
We'll be releasing our own Eastern Front buildings later this year.
The defensive position at the bottom of the picture as scratch built by ourselves.Maybe thats one for another blog entry.
 
Te game as set up at Partizan in September.
And again.
 
As set up at The Worlds, Derby.
 Unfortunatley the guys that were going to run the participation game couldn't make it to the show  so we set it up as  a static demo game. As w had forgotten the box with the village buildings and some of the German defences we put out every Russian vehicle we had. his came to 15 T34's 3 SU122's and 4 SU85's.
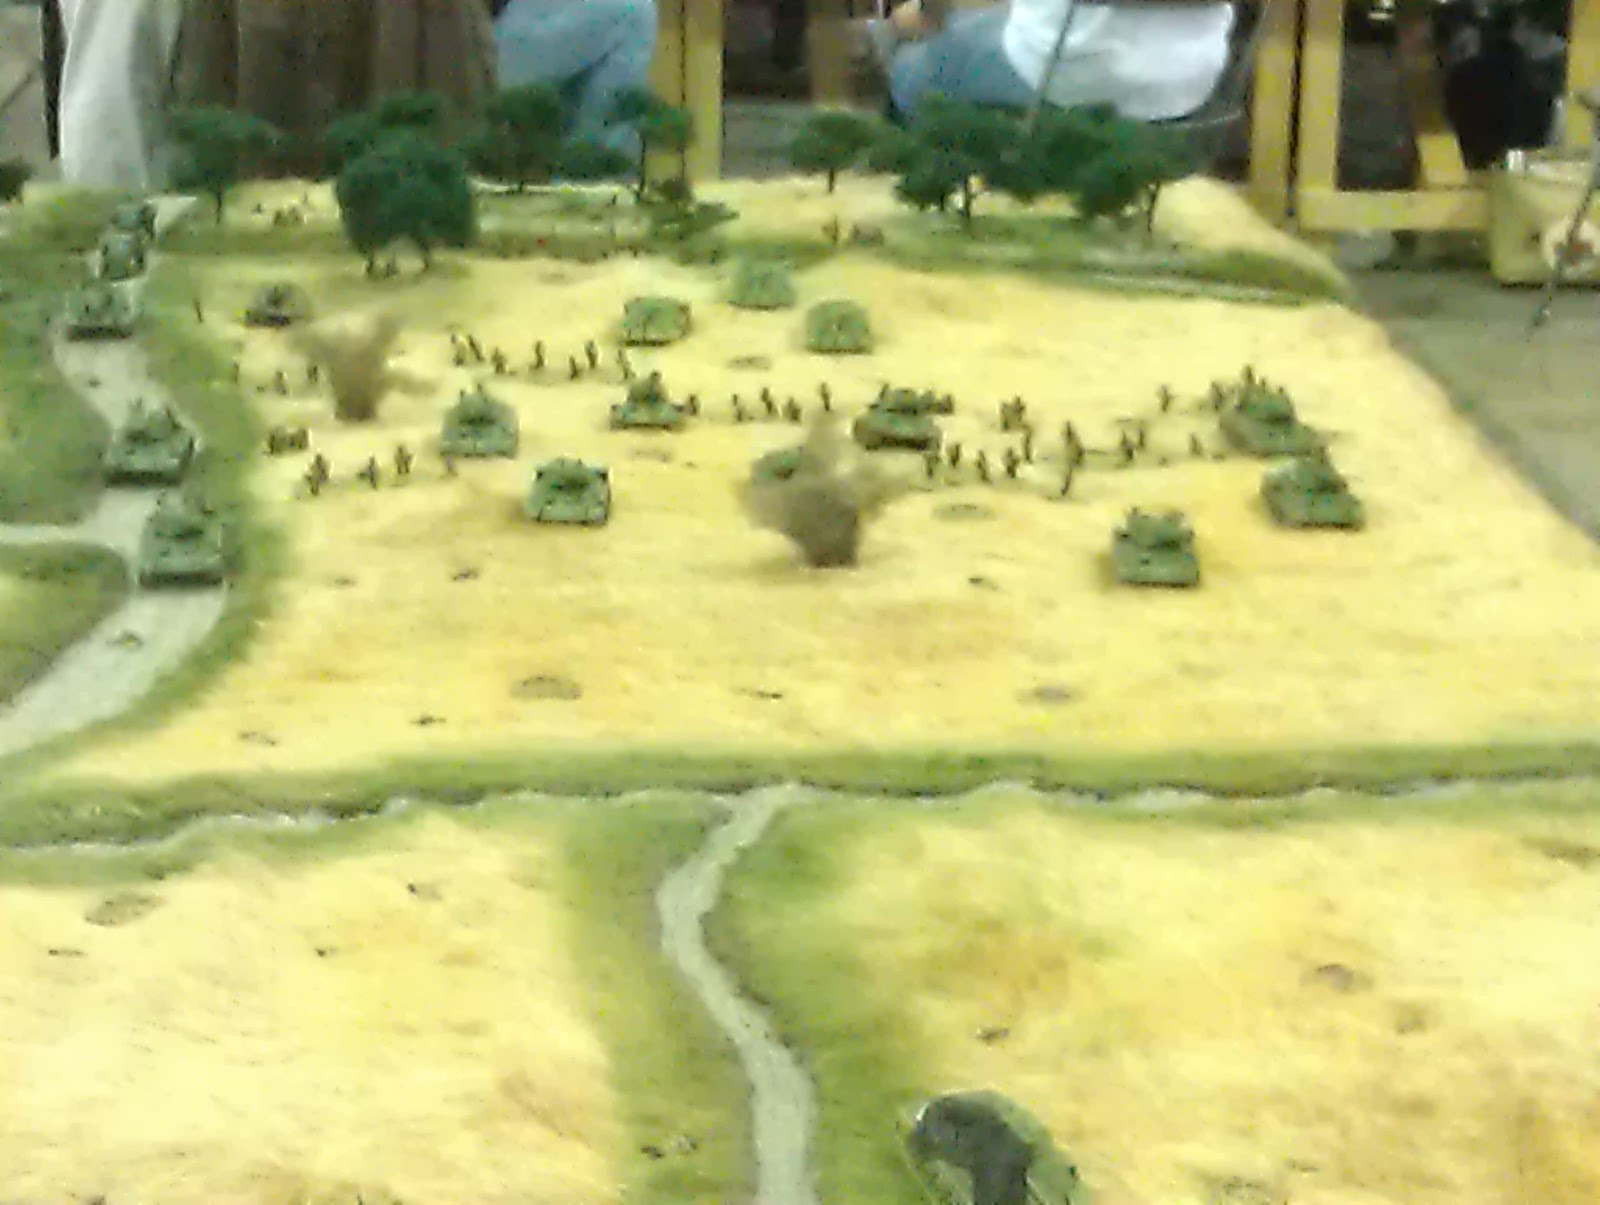
A closer shot of the Russian horde charging across the wheat fields.
All the vehicles and figures are by 1st Corps.
A Corgi Panther awaits the onslaught with 1st Corps German panzer grenadiers  in support.
Materials used.
Teddy bear fur, we used the 'wolf hair ' colour as our base.
supplied by
Fur fabrics and crafts,Tel 0121 7711666
Green paint.  Forest Green fence paint.
Sprays, assorted colours by Humbrol
Acrylic window sealer, dark brown.Available at most DIY stores.
Emulsion paints for roads mixedby local DIY store.


Saturday, 18 August 2012

Making terrain for 1st Corps 28mm WW2 Operation Kutosov

  We've always tried to put on a good looking demo game, so when we decided to do the Operation Kutosov participation game  we thought we'd try something new.
  Phil from the C20th wargames society volunteered to run the game and came up with the rules and scenario.
  We'd seen some impressive looking gaming tables using 'teddy bear' fur so thought we'd give it a try.
The fur would prove to be perfect for the long grass and wheat fields needed for the game.
The colour we chose you use as our base  is called wolf hair, great for the wheat fields.
Roads cut into the fur with a pair of sharp scissors.
  We tried using clippers to trim the fur but found scissors worked far better,if a little hard on the fingers.

Next step was to brush out the loose fur, this helps it stop matting together when the fur is painted.

Brushing out the loose fur.


Testing the acrylic sealer.
As we'd never tried this before we thought it would be a good idea to do a small test piece.

1st Corps 1/48 T34

The sealer we used was from our local hardware shop, it must be an acrylic sealer that will  accept paint. We havn't tried watering it yet, something for the next terrain project.


Roads added.

We used a paint scraper to smooth the sealer onto the roads.


Roads and tracks added.


While the sealer was still wet.the surface of the roads were scored with the end of a brush to look like wheel ruts and cork bits added along the edges of the roads as rocks.

Corgi 1/50 Panthers on the move
Ready to start painting.


Using our fingers, wearing rubber gloves we added the paint along the edges of the roads. It takes a bit of working in to get the paint in deep. The paint we used was a forest green fence paint.Its best  as the paint dries to keep brushing the fur so it  doesn't matt together and look clumpy.


The fur along the edges of the roads was trimmed down  prior to painting so the fur didn't overlap the roads.

Once the edges were done we filled in where we wanted green fields leaving areas for the whet fields.


More on finishing the terrain in the next entry.